
Self-Hosting Sanity Studio with GitHub Actions
Sanity.io provides an amazingly flexible and adaptable content API for modern JAMStack web applications. It also provides an equally remarkable open source content editor for structuring and creating that content: Sanity Studio. This article will show you how to deploy and self-host Sanity Studio on your own project subdomain using GitHub Actions. I’ll use DreamHost as an example hosting provider, but these are generic steps: you should be able to use any service that provides shell access. (And don’t panic if “shell access” sounds like some crazy hacker nonsense: I’m going to explain each step in excruciating detail).
A project’s Sanity Studio can be deployed with one command directly to a sanity.io subdomain, or with just a little bit more fanfare to a service like Netlify. These are both good options if you need something quick and adding another hosted service to your project doesn’t matter to you. Hosting Sanity Studio on your own server takes a little more time to set up, but give you control over the entire build process and keeps the addition of new tools, services, and potential subscription fees to a minimum. There’s also something enticingly tidy about keeping one’s CMS in the same domain as the site it supports.
This guide will show you how to:
- Use your existing hosting service and URL
- Deploy the studio to a subdomain of your production site (like “studio.yourawesomesite.com”)
- Automatically update your studio when you push changes to your studio GitHub repository
I’m not going to lie: there are a lot of steps here.
But: if you take them one at a time and make sure things work correctly along the way (which I’ll show you how to do), you’ll have a set-up that takes care of a lot of the minutia for you—and have a better understanding of how you can wield the powers of SSH, shell permissions, and GitHub Actions (and its Secrets) for the greater good.
On board? Here’s what we’re going to do:
- Set up a subdomain & password-less login on DreamHost
- Set up a workflow on GitHub Actions
- Add studio permissions on Sanity Admin
For an example of what each of these steps look like, I’ll keep each of them in the context of UXMethods.org. UX Methods is a Sanity-driven JAMStack site that uses all of these steps. It is also run from a completely open repository on GitHub, so you can peek into any part of it for an in-the-wild view of how all this works.
Note: These instructions are Mac and DreamHost focused, but should apply with minor variation to other contexts. If you would like to adapt these to different contexts, like Windows, or a hosting provider that requires additional steps, please let me know. You’re more than welcome to copy everything else I’ve done here (with due credit, naturally), and I’ll link to your version in this note.
Another note: I pulled from a bunch of other tutorials, guides, manuals, and specs to put these steps together. Where appropriate I’ll link to those sources. I’ll also, where appropriate, provide you with additional details I wish some of those sources would have provided. I’ll call these out in context, so if this background isn’t interesting to you, you should have a good sense of what you can safely skip over. 👍
Set Up a Subdomain and Password-less Log-In on Dreamhost
Our first step is to create a subdomain for Sanity Studio and configure SSH (Secure Shell) access so that we can get the robots to keep things up to date for us. Here’s what we’re going to do:
- Create subdomain & user
- Set up shell permissions
- Generate named keys
- Write our public key to an authorized_keys file
- Set permissions
- Add a config file
DreamHost has published their own instructions for the password-less log-in steps in this flow. Those instructions boggled my mind a bit the first few times I tried them, so I’ll break down the steps and commands in more detail here so you can better understand what’s going on.
1. Create a Subdomain and User
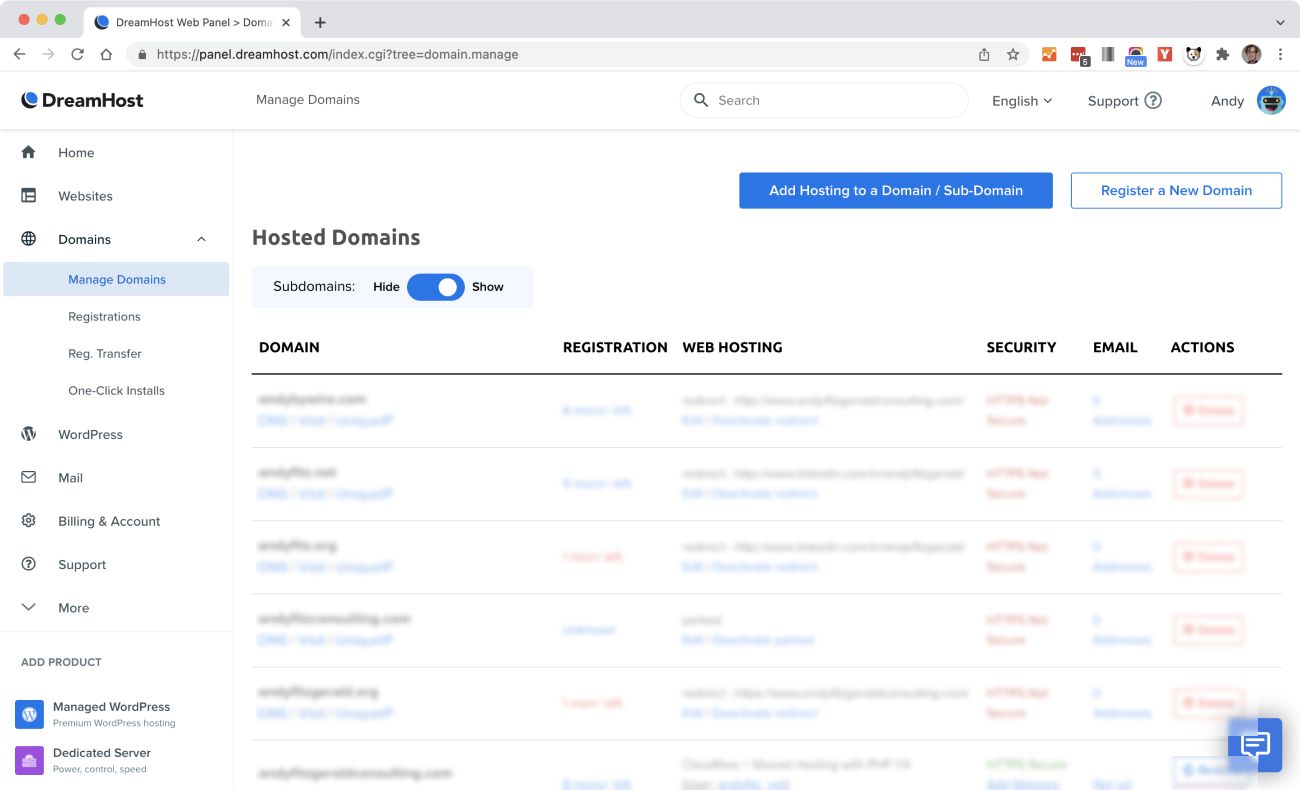
Our very first step is to create a subdomain of our main URL. We’ll use this to access Sanity Studio. In this case, https://studio.uxmethods.org will be the place content contributors go to modify content on http://uxmethods.org. DreamHost makes creating a subdomain of a domain you already own pretty simple. Log in to https://panel.dreamhost.com, go to domains, then manage domains, and click “Add Hosting to Domain / Sub-Domain.”
Type your subdomain and domain in the “Domain to host:” field, then create a new user in the “Users, Files, and Paths” section:
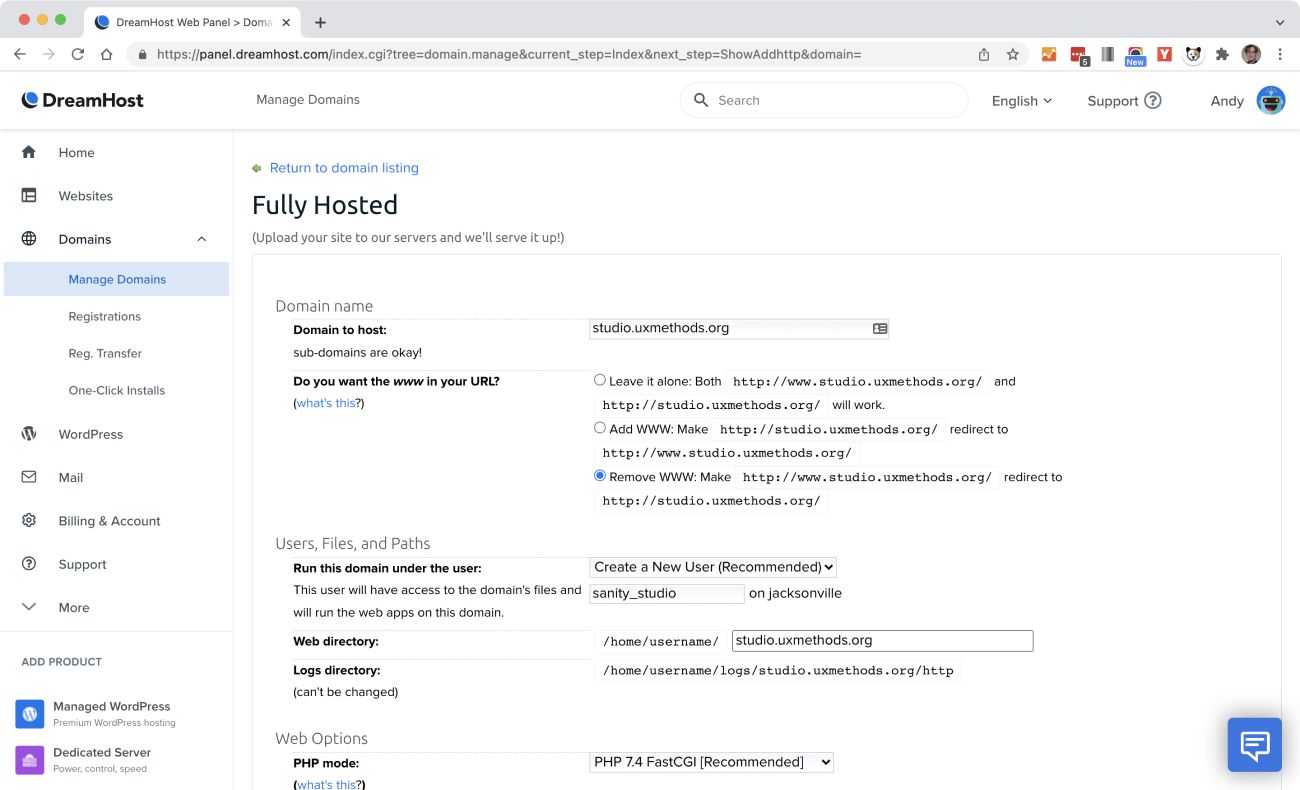
Creating a new user means that if your password or login are ever compromised, only this subdomain will be affected. It’s a simple extra step to take to ensure a reasonable level of security for any other domains you’re working with. Hit the “Fully host this domain” button at the bottom of this section to add the subdomain.
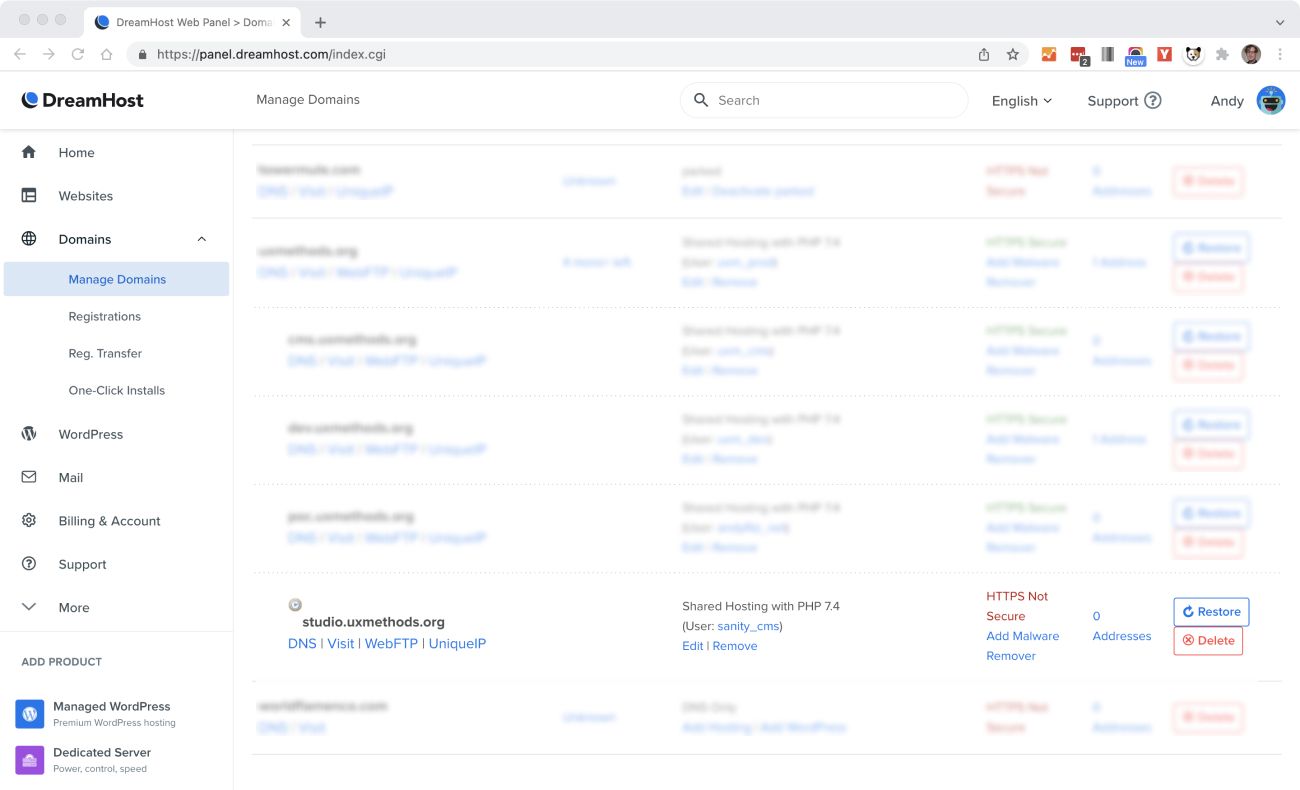
The next screen will give you a confirmation message, as well as a password for your new user. Copy this password down someplace handy—you’ll need it soon. Scroll down to your “Hosted domains” list. You should see your subdomain and new user there. The listing will have a little clock next to it until it’s all sorted out in the system.
2. Add Shell User Access
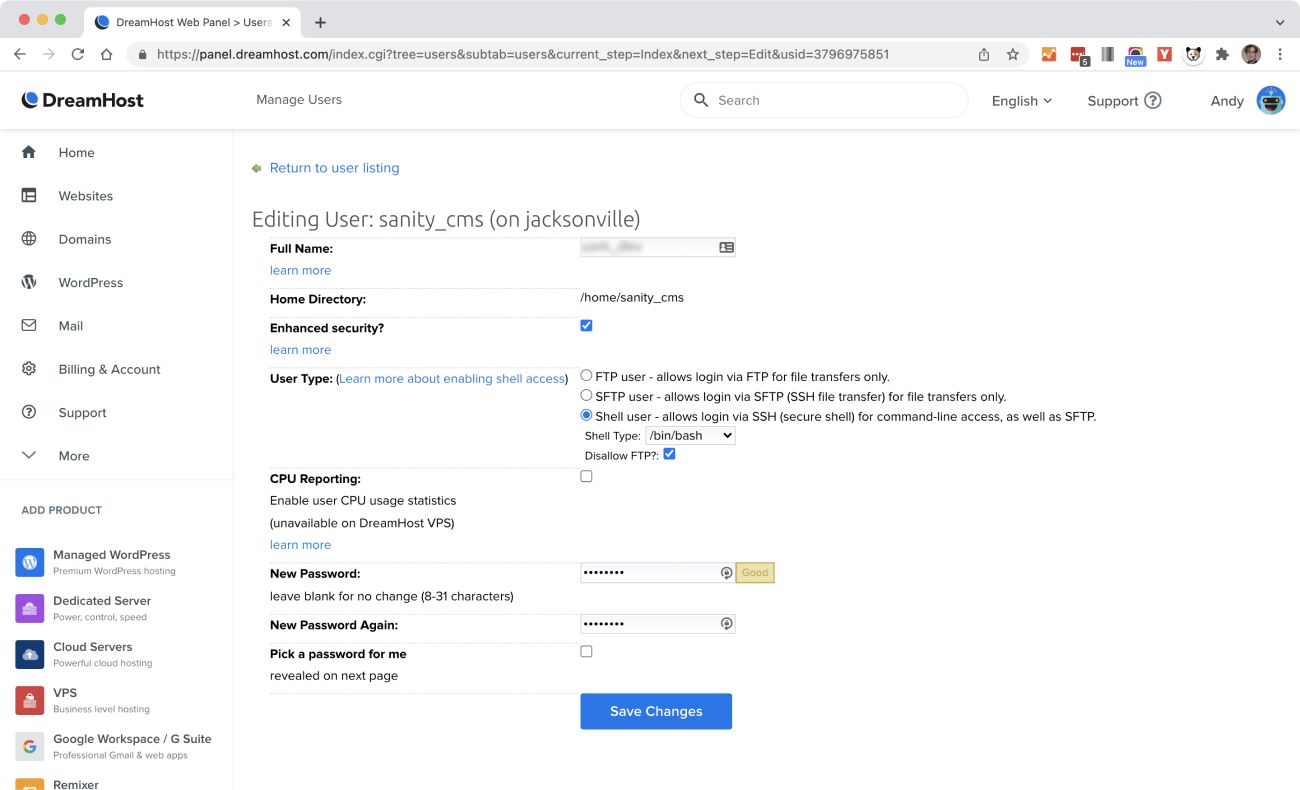
Once your user and domain are sorted (i.e. the clock is gone when you refresh), click the user link and set the user type to “Shell user.” This will allow you to log in via the command line—and run CLI commands from GitHub Actions. You’ll see a success message and a note that the changes will take a few minutes to take effect. While that’s happening, we’re going to open the terminal and create some keys and permissions.
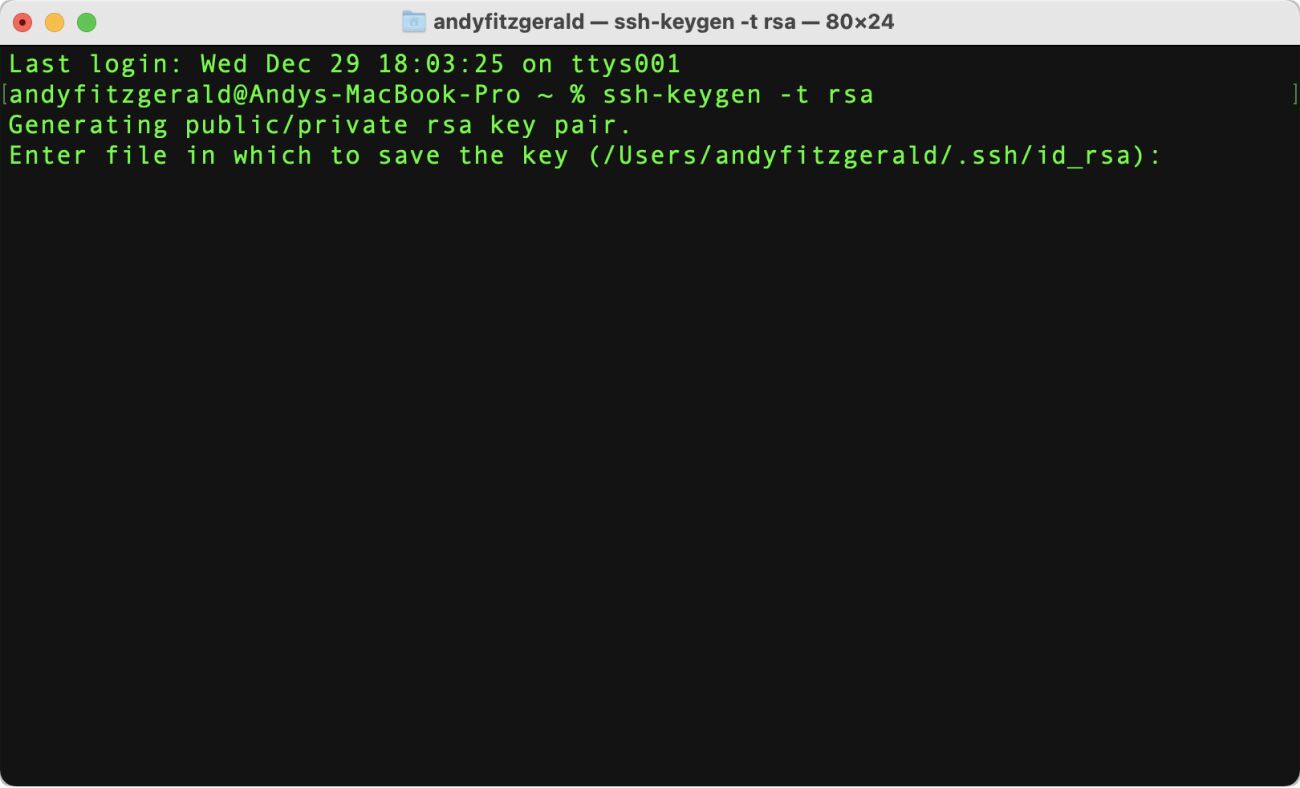
3. Create an RSA Keypair
An RSA Keypair is a set of encryption keys you can use to authenticate sessions between systems—for example between your computer and DreamHost servers, or between GitHub Actions and DreamHost servers. (“RSA” is an acronym of the names of the dudes who came up with it in the 70’s). We’re going to create the keypair in the Mac terminal. We’ll then upload one of those keys to DreamHost in the next step.
To create a keypair, open the terminal and follow these steps:
i. Generate the key:
$ ssh-keygen -t rsa
ssh-keygenis a build in tool for creating authentication keys- the
-toption tells the command that you want a specific type of key rsais the type of key we’re looking for- Terminal Tip: don’t type the “$” in the command, or in any of the commands listed below. The “$” is a convention for the prompt in your terminal. Your prompt may be different; that’s okay, too (mine is a %).
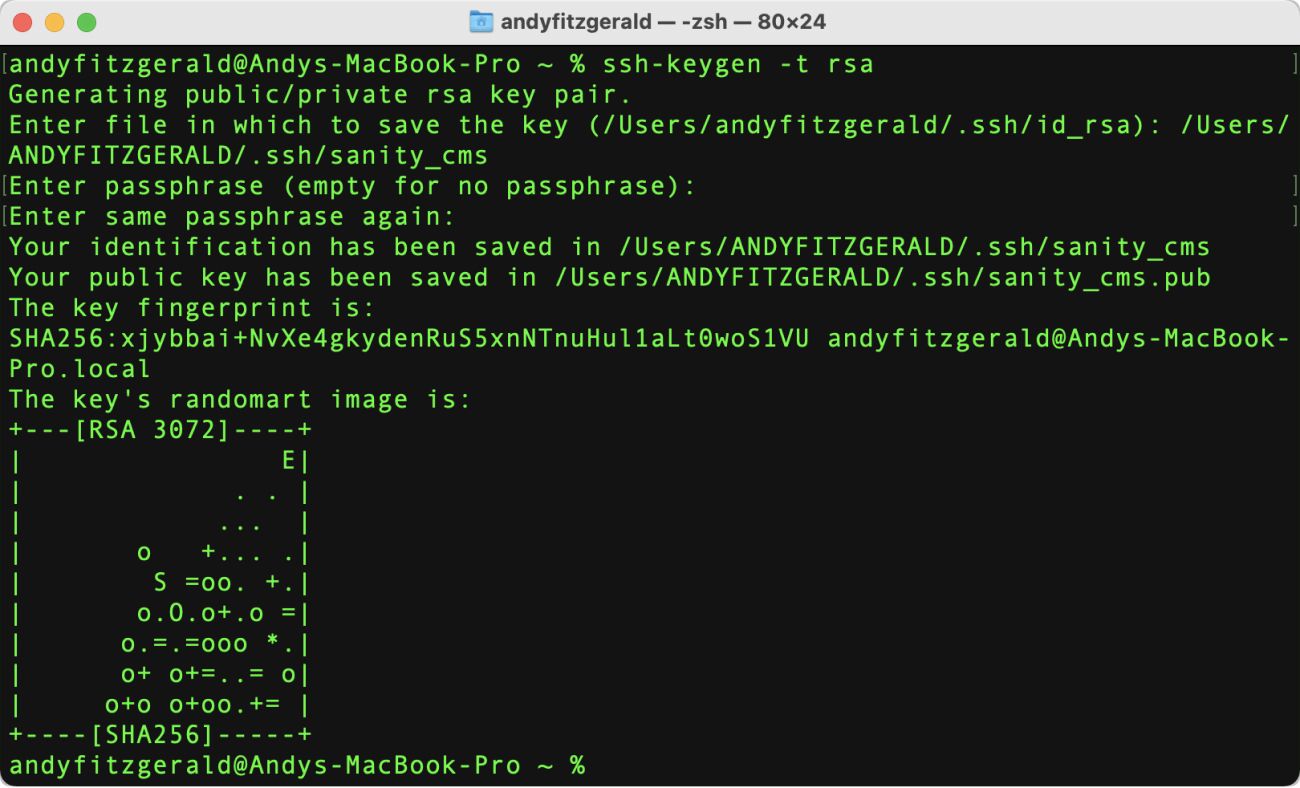
ii. Give the key a name:
/Users/ANDYFITZGERALD/.ssh/sanity_cms
- By default, the key id-rsa will be created, but when you have multiple keys (for different users), you’ll want to give them unique and memorable names. I recommend giving the key the same name as the user name you created on DreamHost—in this example, I’m naming the key “sanity_cms”
- Terminal Tip: I’m following the convention that text that will be different on your system is represented here in ALL CAPS. Be sure to change
ANDYFITZGERALDto whatever your user directory is (and make it lower-case). - The user directory shortcut
~/doesn’t work with ssh-keygen, so you have to use the full path. (I don’t know why. If you do, please let me know in a comment!)
iii. Leave the passphrase field empty—just press return twice.
- Since we’ll be using this for an automated workflow, we don’t want a passphrase here. Just press return twice to move through this question. As ssh.com notes, “Keys without a passphrase are useful for fully automated processes. They allow shell scripts, programs, and management tools to log into servers unattended.”
- You’ll see a key fingerprint and some rando bot-art. Feel free to marvel, though no need to copy this down.
4. Add the Public Key to Dreamhost
What you just created is called a “keypair” because there are two corresponding keys: a private key, that you’ll use to gain access to the DreamHost server, and a public key, that you’ll upload to DreamHost. This is how the server knows to let you in (i.e. if you have the right corresponding private key to its public key).
To copy the public key to DreamHost, run this command:
$ cat ~/.ssh/SANITY_CMS.pub | ssh [email protected] "mkdir ~/.ssh; cat >> ~/.ssh/authorized_keys"
Here’s a breakdown of what’s going on here:
catis short for “concatenate.” This command is super common and allows us to create single or multiple files, view content of a file, concatenate files, and redirect output.- The path following the cat command points to the public key of the RSA keypair we just created (in this case we can use the ~/ user directory shortcut)
- The “pipe” between that and the next command connects the standard output of the left command to the standard input of the right command
ssh [email protected]uses SSH to log into your user directory on DreamHost (the one we created earlier)- Be sure to change the part just before the @ to your key’s name
- The name after @ is your server. Be sure to change this to your server name. (Check here for how to find your server name)
"mkdir ~/.ssh; cat >> ~/.ssh/authorized_keys"creates a directory named .ssh, and then appends your public key to the file “authorized_keys”
If this is your first time connecting to this server, you’ll see this authentication verification. Respond with “yes”:
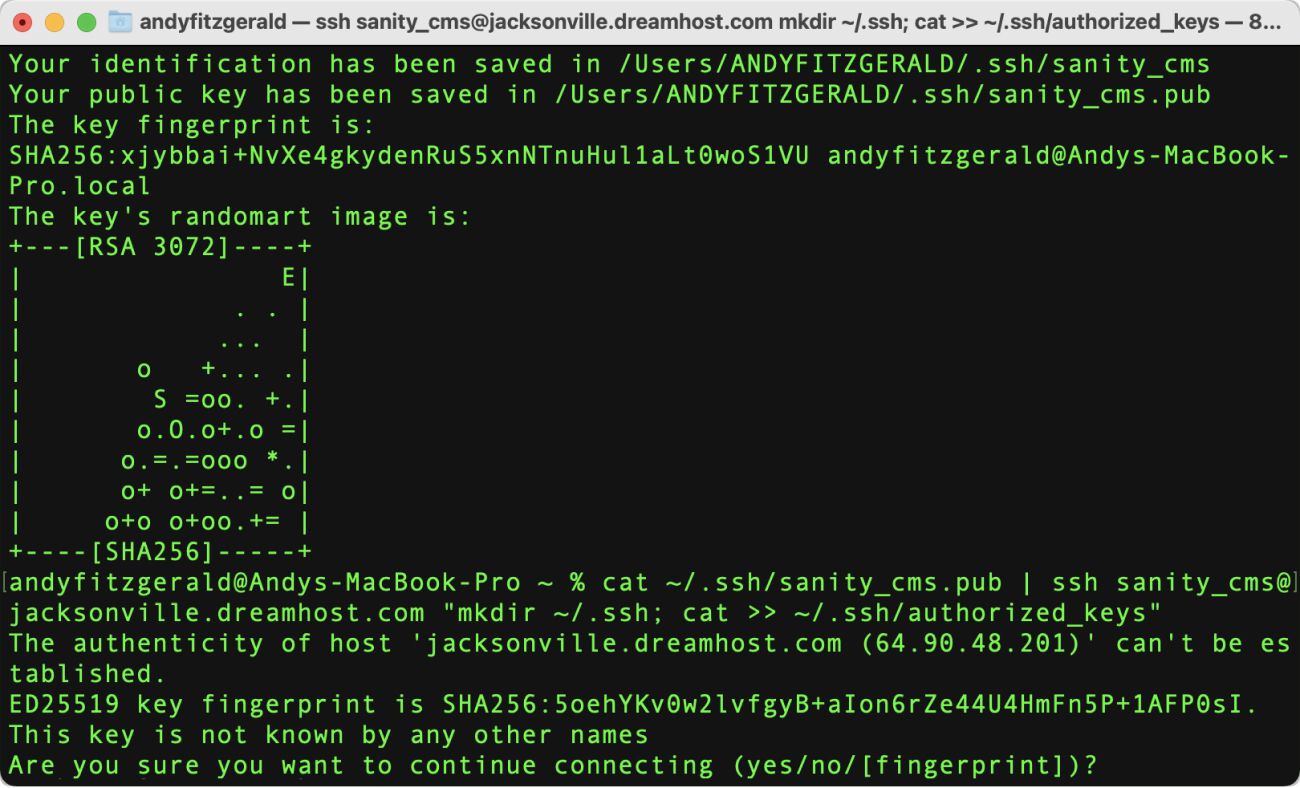
You’ll be asked for the password we created earlier.
- If your password gets denied, see the troubleshooting section at the end of this article.
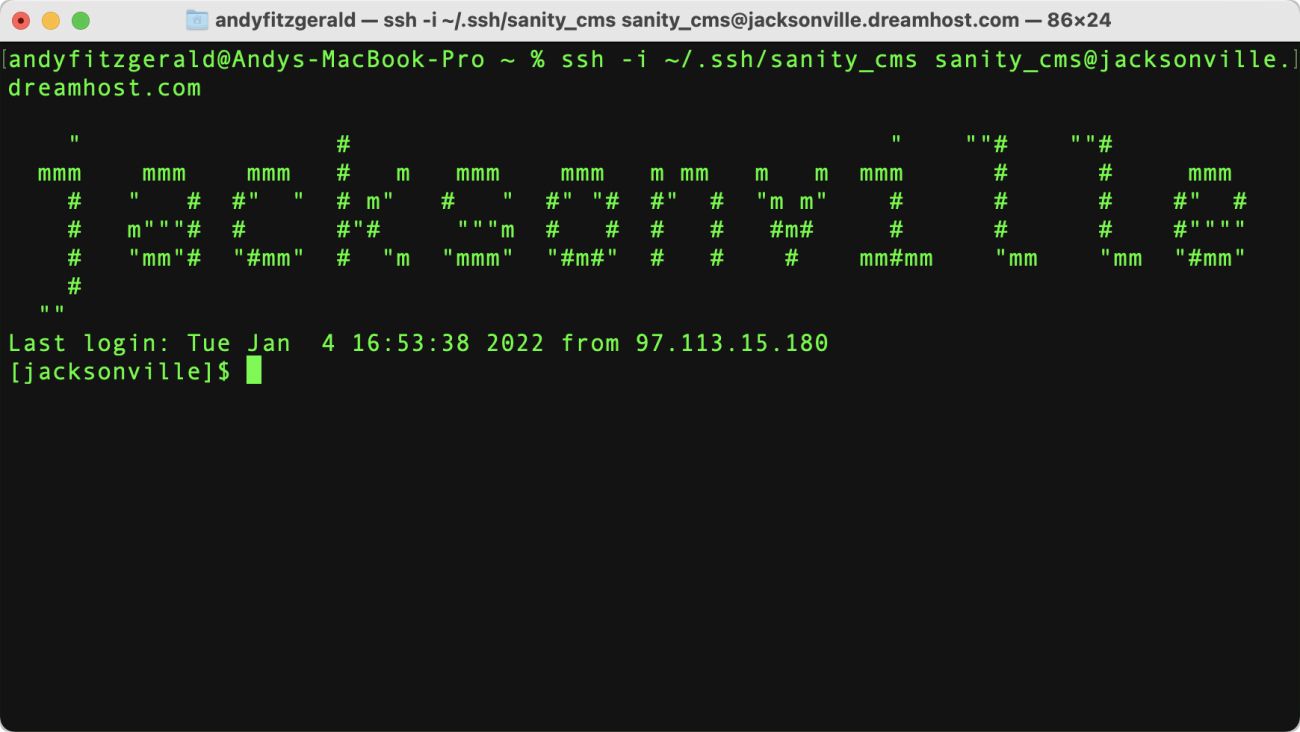
You can test that your keys are properly configured by logging in with SSH:
$ ssh -i ~/.ssh/sanity_cms [email protected]
sshis our Secure Shell command, the-ioption specifies the identity key (private key) to use for authentication. In this case, it’s the private key we created earlier.- Be sure to swap out your key and server name
When you’re successfully logged in, you’ll see a confirmation ASCII art image, and your terminal prompt will change to [SERVER]$
Not working as expected? See the troubleshooting section at the end of this article.
5. Set Permissions
The commands we just executed created a new folder under your DreamHost user named /.ssh with 755 permissions. 755 means that everyone can read and execute the file, and you (the owner) are allowed to write to the file as well. The “authorized_keys” file has 644 permissions, which means that you (the owner of the file) have read and write access, while the group members and other users on the system only have read access. DreamHost recommends changing these to 700 (full access for you, the owner, no access to anyone else) and 600 (full read and write access to the file for you, no access to anyone else) respectively.
Since we logged in to the DreamHost server in the last step, we can change file permissions from the terminal now with two commands:
$ chmod 700 ~/.ssh $ chmod 600 ~/.ssh/authorized_keys
Modifying permissions is a super common command line task. Here’s how these commands work:
chmodis the command to change file permissions- The number following the command is the permission level to set
- The path following the permission is the file whose permissions we’re changing
6. Add a Config File (Optional)
This last step is optional, but makes logging in from your local terminal a lot easier. The reason we needed to use ssh -i [key] [login address] earlier is because we added a named key to our .ssh folder. If you don’t name the key, SSH will simply name it id_rsa, and will then look for that key when you use SSH to log in.
This is fine if you only ever log in one place, or log in everywhere with the same identity. As you might imagine, this poses a security risk if you have multiple domains, for example a domain running production, and a subdomain running your CMS (as I’m proposing here). If the security of one of those is compromised, the security of both is compromised. This gets riskier the more you use the same user (and authentication key) for multiple domains, properties, and projects.
One solution to this security concern is to create a new user for each domain. Having to type ssh -i [key] [login address] every time you want to log in, however, is a pain. This is what the SSH “config” file is for. It tells SSH which private key to use for each domain. It also lets you set up an alias, so instead of typing
$ ssh -i ~/.ssh/sanity_cms [email protected]
or even
$ ssh [email protected]
you can just type $ ssh sanity_cms, and you’re logged in.
Note: This opens security issues if others use your computer. Be sure your individual machine is password protected, or skip this step if there’s no way to keep miscreants and ne’er-do-wells off your system.
The basic structure of the config file is simple. It consists of a series of records for each authority file, user, and directory you use to log in:
Host sanity_cms
 HostName jacksonville.dreamhost.com
 User sanity_cms
 IdentityFile ~/.ssh/sanity_cms
Here’s what each line does:
Hostspecifies the short name you’ll use to log in with SSHHostNamespecifies the server and domain (remember to change “jacksonville” to your own server)Userspecifies the user for this log-in. In this case, it’s the user we created above.IdentityFilespecifies the path to that user’s corresponding private key
Note the spaces for the three lines under “Host.” This is how SSH knows these directives go together. You’ll create this file in the ~/.ssh directory on your machine. Name the file simply “config”—there is no .type file extension after it.
A lot of terminal tutorials recommend using VIM, a terminal-based text editor, for this kind of thing. You can go this route if you like, but I find it super unintuitive, and see no reason not to use the same text editor I use for everything else to create a simple file. 🤷♂️
Since .ssh is a hidden file, you’ll need to un-hide it before you can navigate to it with Mac’s Finder. On the current Mac OS, you can press cmd + shift + . when you’re in Finder and it will show your hidden files. The .ssh file will be in the Users/YOURUSERNAME/directory. When you open it, you should see the keys we’ve already created. Create a new file in that directory with VS Code, Sublime Text, or whatever editor you use, then add your config record using the parameters above.
Save the file and log in with ssh sanity_cms (or whatever you’ve named your host):
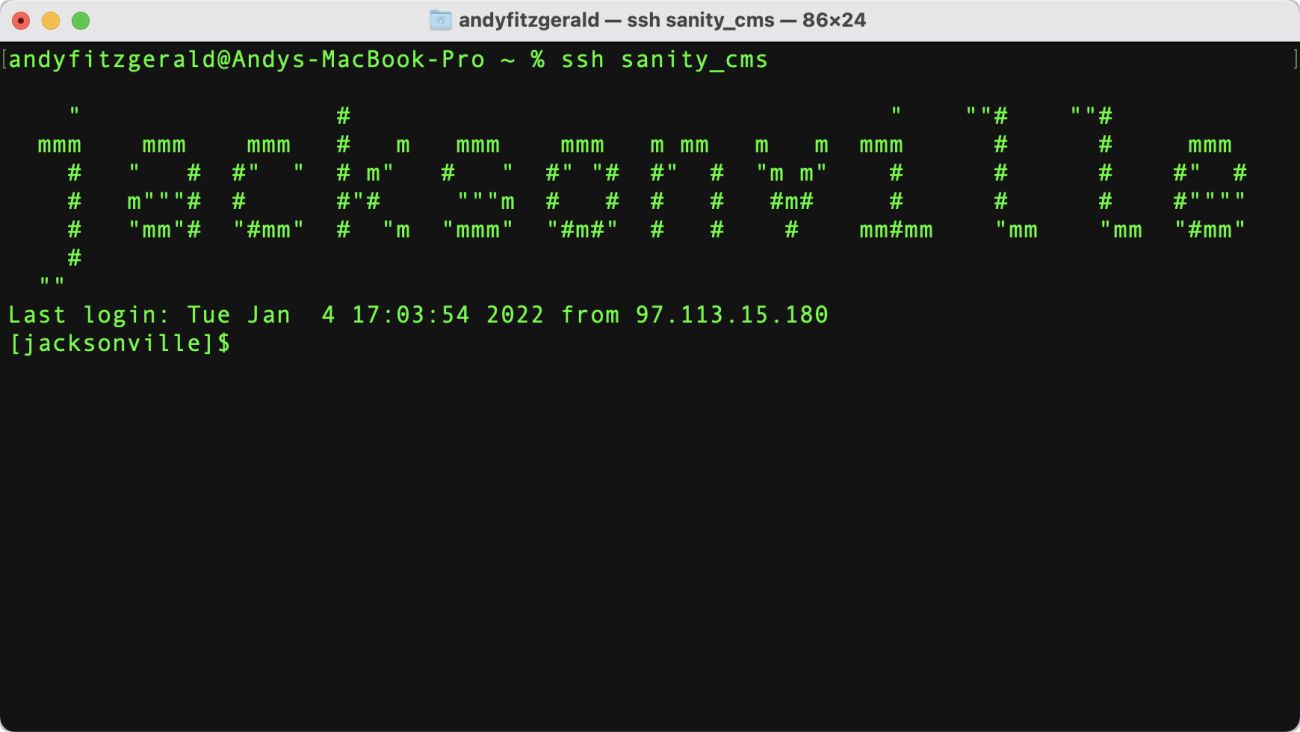
Now revel in the glory of simple password-less log-in! 🎉
(…or hit the “troubleshooting” section below 🧐)
Set Up a Workflow on GitHub Actions
GitHub Actions is a continuous integration and continuous delivery (CI/CD) platform that allows you to automate your build, test, and deployment pipeline. You can use the shell access and authentication keys we set up in step one to use GitHub Actions to build and push a Sanity Studio instance to your new DreamHost subdomain every time you push to the main branch—all without having to log in or move files around manually.
You can think of a GitHub Actions workflow as a way to “borrow” a new, single use computer, set it up with your development environment, complete a task, then wipe the whole thing clean and give it back. There’s a lot more you can do with GitHub Actions, but this is a good way to get familiar with the basic steps if you’re new to the tool.
The tasks we want to accomplish are to build a new version of Sanity Studio and then upload that version to our studio subdomain. We want this to happen every time we push changes to the main branch of our project repository. Here’s how we’re going to do that:
- Create a workflow file in our public repo
- Define the event that triggers the workflow
- Set up the development environment
- Build the studio
- Set up SSH
- Upload the studio build to our subdomain
This sequence of steps assume that you have a Sanity project that you’re tracking with a public GitHub repository. If you don’t yet have a Sanity project, check out the starter projects on the Sanity site. One of these will have you up and running in minutes. The Blog with Gatsby starter is the closest to the setup I’m using for the rest of this guide, but any studio tracked in a GitHub repo should follow similar steps.
Escape hatch: This workflow has about the same level of complexity (albeit a few more steps) as GitHub’s quick start guide for GitHub Actions. If you find yourself a bit overwhelmed, that guide could be an easier way to get your feet wet first. GitHub’s in-depth tutorial is also excellent, for when you want to fold a bit more complexity and for greater control over what runs when and how.
1. Create a Workflow
GitHub Actions workflows are orchestrated via YAML files in the .github/workflows directory. To get started, follow these steps:
- Create a .github/workflows directory in your repository on GitHub
- In the .github/workflows directory, create a file named “sanity-studio.yml”
- At the top of sanity-studio.yml, give your workflow a name:
name: Build & Deploy Sanity Studio
This sanity-studio.yml file defines “the workflow.” Workflows are triggered by Events and run Jobs that execute steps in sequential order on a Runner (our borrowed computer). A step can be a shell script or an Action, which is a bundle of steps for executing a complex and frequently repeated task. You can write your own actions, or you can use pre-made actions published in GitHub’s Marketplace. For this workflow, we’re going to use shell scripts and existing actions.
2. Define the Event that Triggers the Workflow
Now that we have a workflow defined, we need to tell it when to run by defining the event that triggers it. There are lots of ways to trigger workflows. For our purposes, we want it to run when we push to the main branch.
To do this, we’ll define the on: key:
name: Build & Deploy Sanity Studio
on:
  push:
    branches:
      - main
Be sure to note the indentation—this is important for the structure of your YAML file. Now that we have a trigger, we can begin setting up the job to be run.
3. Set Up the Development Environment
The Steps in a workflow are executed within one or more Jobs. In this example all of our steps are in a single Job, which we define with the jobs key:
name: Build & Deploy Sanity Studio
on:
  push:
    branches:
      - main
jobs:
  build-and-deploy:
    name: Build & Deploy Sanity Studio
    runs-on: ubuntu-latest
The keys that follow build-and-deploy configure the job. In this case we want our job to run on the latest version of Linux (this is the most generic option). The name: key is optional and allows us to give the job a more descriptive name that will be easier to pick out later on the runner.
Once we’ve configured our job, we can start adding steps. We’ll need to install Node and our project dependencies to accomplish our build tasks, but before we do that we’ll check out the repository code. We do this so that any changes that may be pushed while our job is running won’t interfere with the process in progress:
name: Build & Deploy Sanity Studio
on:
  push:
    branches:
      - main
jobs:
  build-and-deploy:
    name: Build & Deploy Sanity Studio
    runs-on: ubuntu-latest
    steps:
      - name: Checkout Code
        uses: actions/checkout@v2
The Checkout Code step uses the checkout action from GitHub’s “actions” repository, specified with the uses: key. The @ allows you to specify the version of the repository to use.
Next we’ll install Node. Here we’ll also use an action from the GitHub Actions repository. This action adds the with: key, which specifies the version of Node to use. “17.x” means the newest release of version 17:
name: Build & Deploy Sanity Studio
on:
  push:
    branches:
      - main
jobs:
  build-and-deploy:
    name: Build & Deploy Sanity Studio
    runs-on: ubuntu-latest
    steps:
      - name: Checkout Code
        uses: actions/checkout@v2
      - name: Install Node.js
        uses: actions/setup-node@v1
        with:
          node-version: '17.x'
Finally, we install project dependencies with npm, which is now available as we’ve installed Node. Instead of the uses: key, which specifies an action, here we use the run: key. This allows us to run command line commands, just as you would do in the terminal. npm ci will install project dependencies (ci stands for ‘clean install’ and is the preferred install option for automated environments):
name: Build & Deploy Sanity Studio
on:
  push:
    branches:
      - main
jobs:
  build-and-deploy:
    name: Build & Deploy Sanity Studio
    runs-on: ubuntu-latest
    steps:
      - name: Checkout Code
        uses: actions/checkout@v2
      - name: Install Node.js
        uses: actions/setup-node@v1
        with:
          node-version: '17.x'
      - name: Install Project Dependencies
        run: npm ci
        working-directory: studio
We’ve also added a working-directory key in this step. This tells GitHub to execute the run command in the /studio directory. It’s like changing directories in the terminal with cd. We need to specify a working directory here because this project repo—like Sanity’s Sanity-Gatsby starter—is a “monorepo”: it’s got two distinct projects wrapped into one repository. One is for the Gatsby front end, one is for Sanity Studio. We only need to install dependencies for Sanity for this job, so we’ll be working in just that directory.
4. Build Sanity Studio
With our dependencies installed, we can now instruct our runner to build a fresh version of Sanity Studio. There are three steps in this task:
- Installing the Sanity Command Line Interface (CLI)
- Running the
$ sanity buildcommand - Verifying the build
OMG-this-guide-is-getting-long note: In order to keep the workflow code block manageable, I’ll focus on just these steps for now, but don’t worry—I’ll put the whole thing together in a copy-able block below when it’s complete.
First we’ll install the Sanity CLI. We can do this in GitHub actions with a simple NPM install command and the run key. There is a published GitHub Action for Sanity available, but since we’re only going to be running the build command, which doesn’t require an authorization token, I’ve found that simply installing the CLI is faster:
      ...
      - name: Install Sanity CLI
        run: npm install -g @sanity/cli
Once the CLI is installed, we’ll run sanity build to build the production version of the Studio. As we did with project dependencies above, we want this command to run as if we had cd‘d into the studio folder, so we’ll use the working-directory: key:
      ...
      - name: Install Sanity CLI
        run: npm install -g @sanity/cli
      - name: Build Studio
        run: sanity build
        working-directory: studio
The last action in this section is a check to make sure the build ran as we expected:
      ...
      - name: Install Sanity CLI
        run: npm install -g @sanity/cli
      - name: Build Studio
        run: sanity build
        working-directory: studio
      - name: Verify Build
        run: ls -la dist
        working-directory: studio
ls lists the contents of the /dist directory, specified after the command
- The
-laoption is two commands combined into one that give us a full reading of the output: it combines the options for long list format,-l, and for show all files,-a
This list will show up in GitHub actions when you run it. I find these kinds of checks useful for building an effective set of commands one step at a time. This usually means I end up spending less time debugging—and gives me some checkpoints when I do have to work out a problem. That said, once you’re sure everything is working, you can safely remove this step from the workflow.
5. Set Up SSH
Next we’ll use the SSH keys we created in the first part of this guide to allow our action to access our DreamHost server. This will let us push the Sanity Studio instance we just built to our new subdomain’s web directory.
To do this, you need to make the private key from the RSA pair you created earlier available to the GitHub Actions runner. You don’t want to just add that key directly into a step, however, because that means that anyone looking at your repo would be able to copy and use your key. If your repo is public, this is basically giving the entire internet access to your server. 🧐
Fortunately, GitHub has a tool for keeping your secrets, well, secret. It’s called “Secrets,” and you can get to it from the “Settings” tab in your repository.
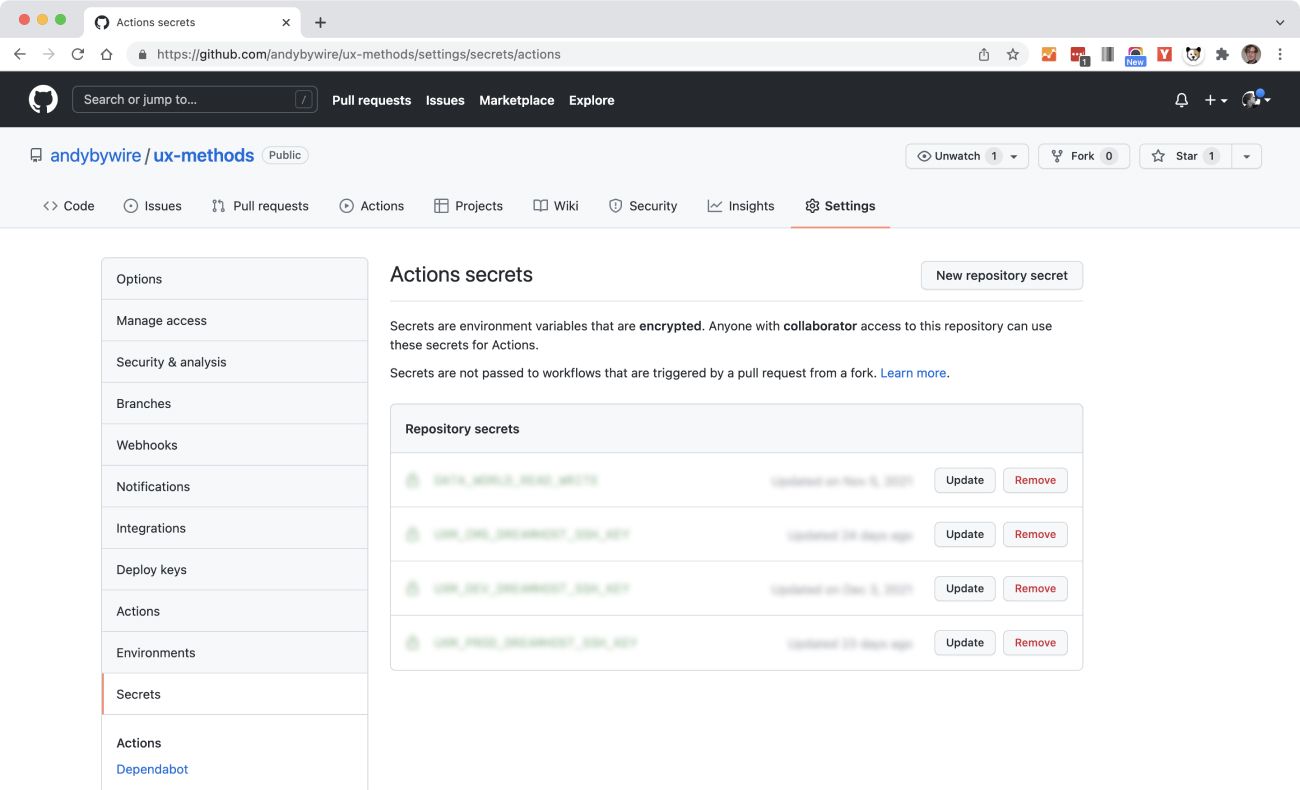
To use your private RSA key in our SSH action:
- Click the “Add a new repository secret” button
- Copy the contents of your private named key file into the Value field. Your private key will begin and end with the these statements:
-----BEGIN OPENSSH PRIVATE KEY-----
and-----END OPENSSH PRIVATE KEY-----
Copy everything between—and including—these lines. - Give your secret a name. I’ve used SANITY_CMS_DREAMHOST_SSH_KEY in this example. All caps and “snake case” (underscores) is the naming convention for secure keys.
Now that you have a secure way to access your RSA key, we can use it to set up the SSH permission step in our workflow:
      ...
      - name: Set Up SSH
        run: |
          mkdir -p ~/.ssh/
          echo "${{ secrets.SANITY_CMS_DREAMHOST_SSH_KEY }}" > ~/.ssh/sanity_cms
          sudo chmod 600 ~/.ssh/sanity_cms
          ssh-keyscan -H "jacksonville.dreamhost.com" > ~/.ssh/known_hosts
There’s a lot going on in this step. Here’s the breakdown:
- The pipe symbol at the the
run:key signifies that the indented text that follows should be interpreted as a multi-line value. You can think of this step as actually four steps you would otherwise run on the command line in sequence. mkdir -p ~/.ssh/creates an .ssh directory at the root of our runner (the GitHub Action computer we’re “borrowing” for this workflow). The-poption creates any needed parent directories.echo "${{ secrets.SANITY_CMS_DREAMHOST_SSH_KEY }}"outputs the content of our secure private key using the “Secrets Context”. You can read more about Contexts and Expression Syntax (${{ <expression> }}) in the GitHub Actions docs.~/.ssh/sanity_cmsadds that secret to the filesanity_cmsin the .ssh directory we just createdsudo chmod 600 ~/.ssh/sanity_cmslimits access to your key to just you. GitHub actions require this for security.- The last line,
ssh-keyscan -H ...adds a hash of our host address to the .ssh directory in theknown_hostsfile. “known_hosts” is a list of all SSH server host public keys that you have determined are accurate. Read more about known-host files here.
This step is heavily indebted to Andrew Villazon’s excellent “Automatically deploying a Gatsby site with Github Actions” article. Check it out if you’re a Gatsby user!
6. Upload the Studio Build to the Subdomain
Now that we have a) a distribution-ready build of Sanity Studio, and b) SSH access, we can finally instruct the workflow to upload that build to the subdomain we created in the very first task above:
      ...
      - name: SFTP Upload
        run: sftp -i ~/.ssh/SANITY_CMS [email protected] <<< $'cd studio.uxmethods.org \n put -r studio/dist/*'
Here’s a breakdown of what’s going on in that run: key:
sftp -i ~/.ssh/...opens a connection to our server using SSH File Transfer Protocol (sftp) using the identify file (-i) we created earlier and loaded into the~/.sshdirectory in our runner (our borrowed computer)<<<is a “here-string”: it passes the quoted text on the right of the here-string to the standard input of the command on the left. You can think of this as running a sequence of commands from the SFTP prompt (credit for this formulation and clear explanation again goes to Andrew Villazon).cd studio.uxmethods.orgmoves us into our subdomain’s directory on the DreamHost server\n put -r studio/dist/*creates a line break (\n), which distinguishes our second command, then runs aputcommand which uploads the files in thestudio/dist/directory on our runner to the subdomain directory on the server. The recursive option (-r) makes sure that subdirectories are included.
And that’s it! Here’s the entire workflow:
name: Build & Deploy Sanity Studio
on:
  push:
    branches:
      - main
jobs:
  build-and-deploy:
    name: Build & Deploy Sanity Studio
    runs-on: ubuntu-latest
    steps:
      - name: Checkout Code
        uses: actions/checkout@v2
      - name: Install Node.js
        uses: actions/setup-node@v1
        with:
          node-version: '17.x'
      - name: Install Project Dependencies
        run: npm ci
        working-directory: studio
      - name: Install Sanity CLI
        run: npm install -g @sanity/cli
      - name: Build Studio
        run: sanity build
        working-directory: studio
      - name: Verify Build
        run: ls -la dist
        working-directory: studio
      - name: Set Up SSH
        run: |
          mkdir -p ~/.ssh/
          echo "${{ secrets.SANITY_CMS_DREAMHOST_SSH_KEY }}" > ~/.ssh/sanity_cms
          sudo chmod 600 ~/.ssh/sanity_cms
          ssh-keyscan -H "jacksonville.dreamhost.com" > ~/.ssh/known_hosts
      - name: SFTP Upload
        run: sftp -i ~/.ssh/SANITY_CMS [email protected] <<< $'cd studio.uxmethods.org \n put -r studio/dist/*'
Push the workflow file to your main GitHub branch, then head over to your repository page and click on the “Actions” tab. You should see your workflow running in the “All workflows” lists:
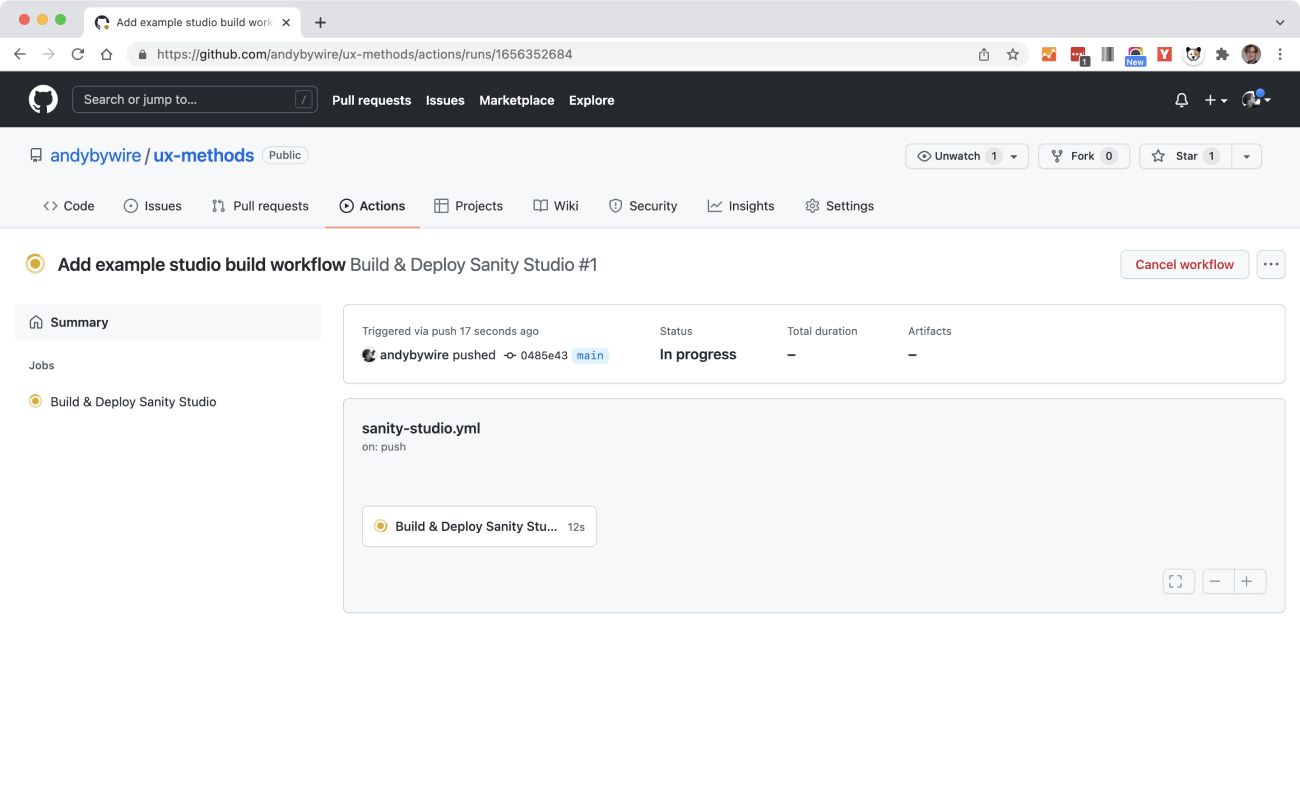
Click into the workflow in progress, and then into the currently running job and you’ll see the steps we wrote out above being executed. You can click into individual steps and see the commands being run. This is also where you can check in on the output of the verification steps we set up along the way.
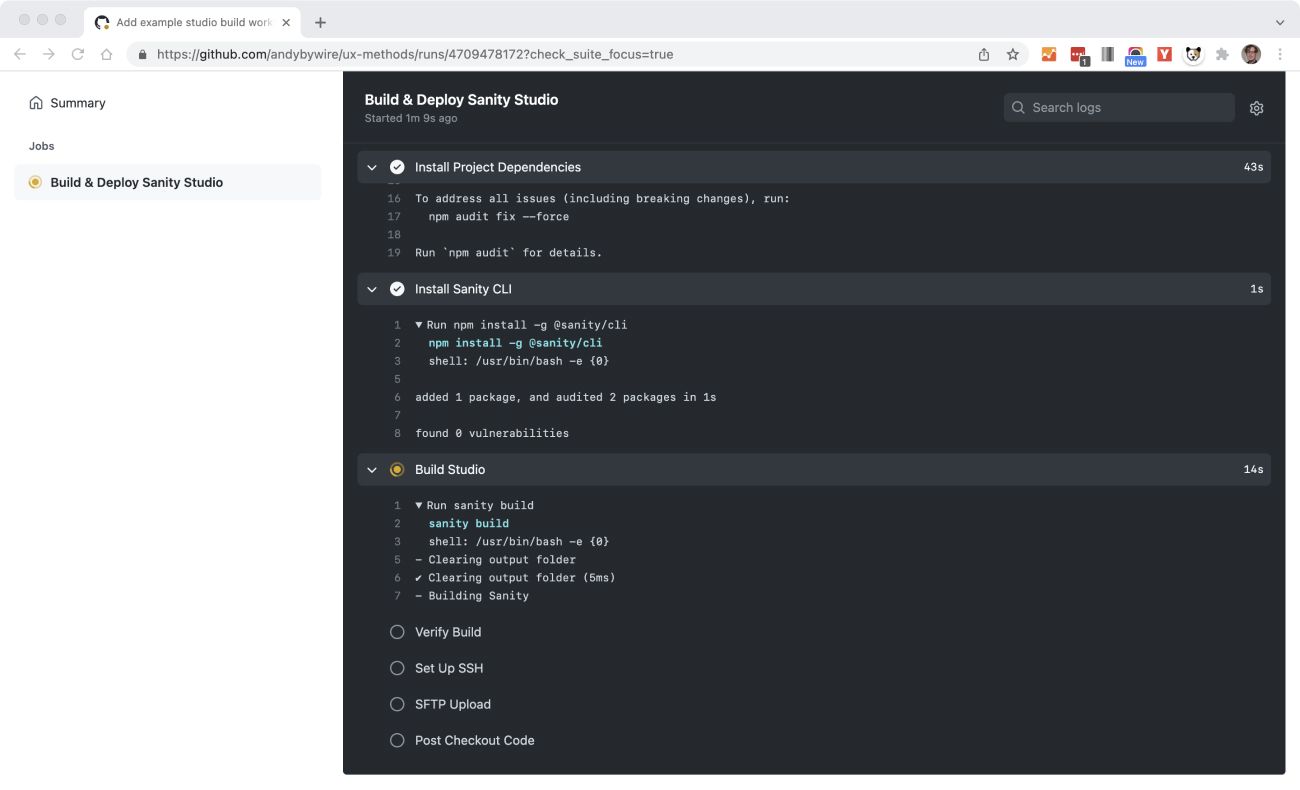
If any of your steps fail, this is where you’ll find error messages. If you’ve verified that your SSH setup works and have followed along with the intermediary verification steps in the workflow, you should be able to spot any bugs by reading the error messages. (Check out the “troubleshooting” section below for tips on common problems.)
Once your workflow completes successfully, you’ll see a green check next to the task, job, and workflow on each of the corresponding pages. If you go to your subdomain, you should see something that looks like this:
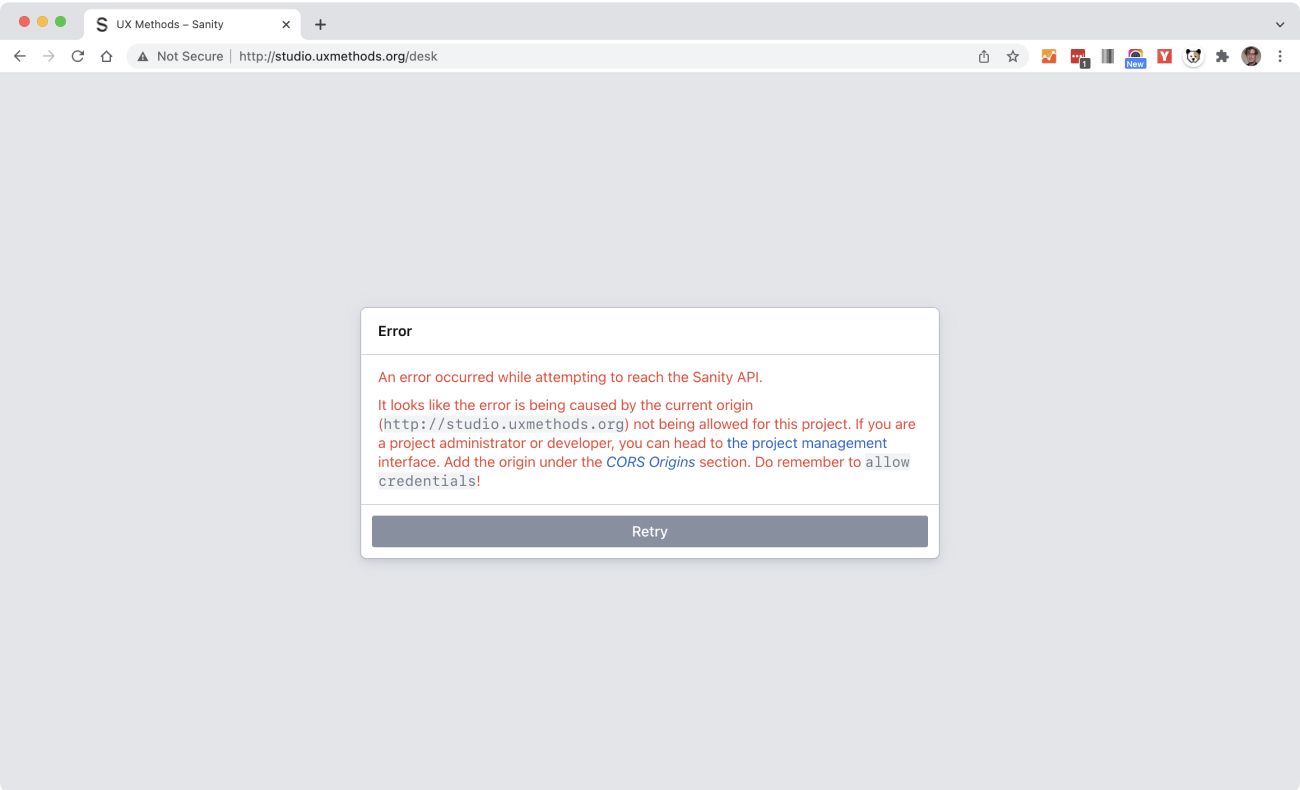
This looks like something went wrong, but it’s exactly what we want here. This means that Sanity Studio was successfully uploaded to your subdomain.
It also means that Sanity’s built-in security is working: until you explicitly allow this origin (your subdomain) to access your Sanity dataset, there’s no way that you (or anyone pretending to be you) can read, write, or otherwise fiddle with your content via Sanity Studio. This brings us to our final step.
Add Permissions to Sanity
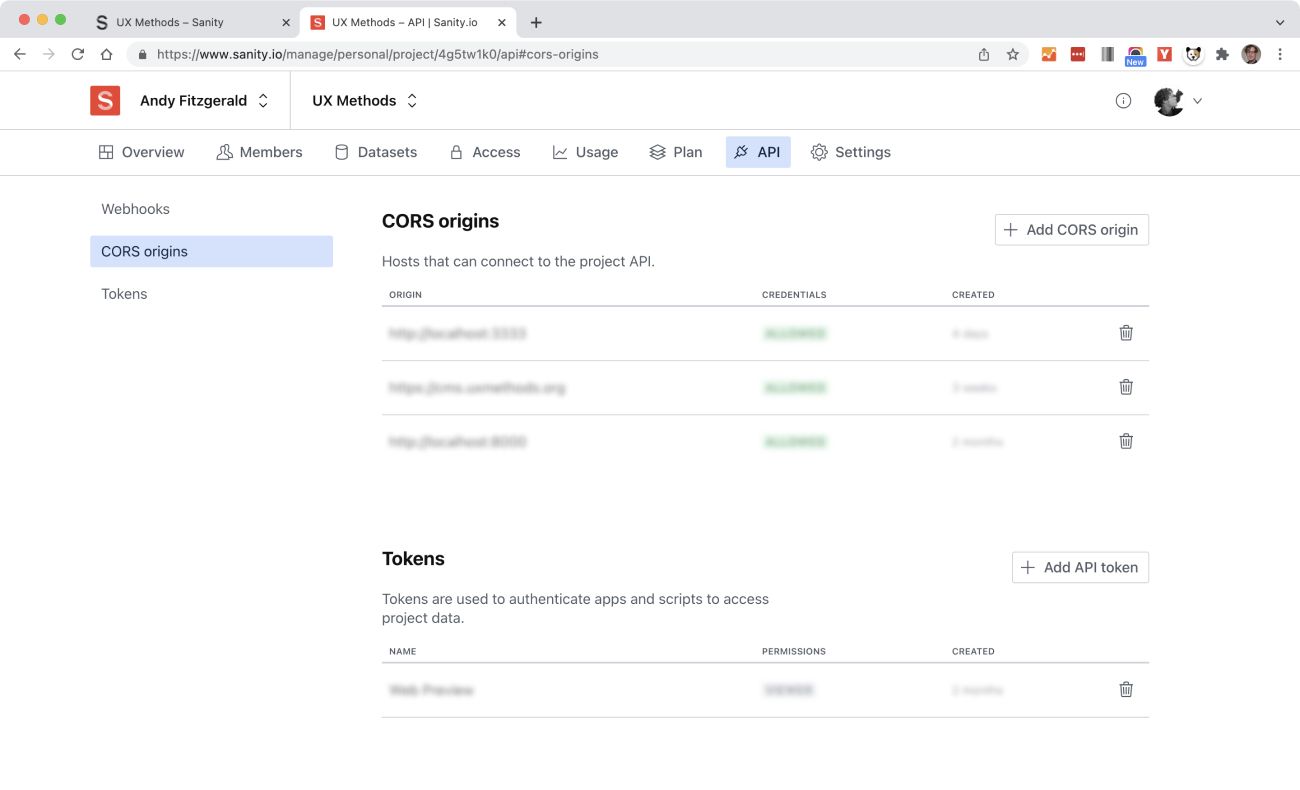
In order to allow your installed Sanity Studio instance to access your Sanity content dataset, you need to allow your new Studio subdomain as a CORS origin. CORS (Cross-Origin Resource Sharing) rules control which domains can access a resource. To add your Studio subdomain, log in to your Sanity admin account and navigate to the “CORS origin” menu in the “API” tab.
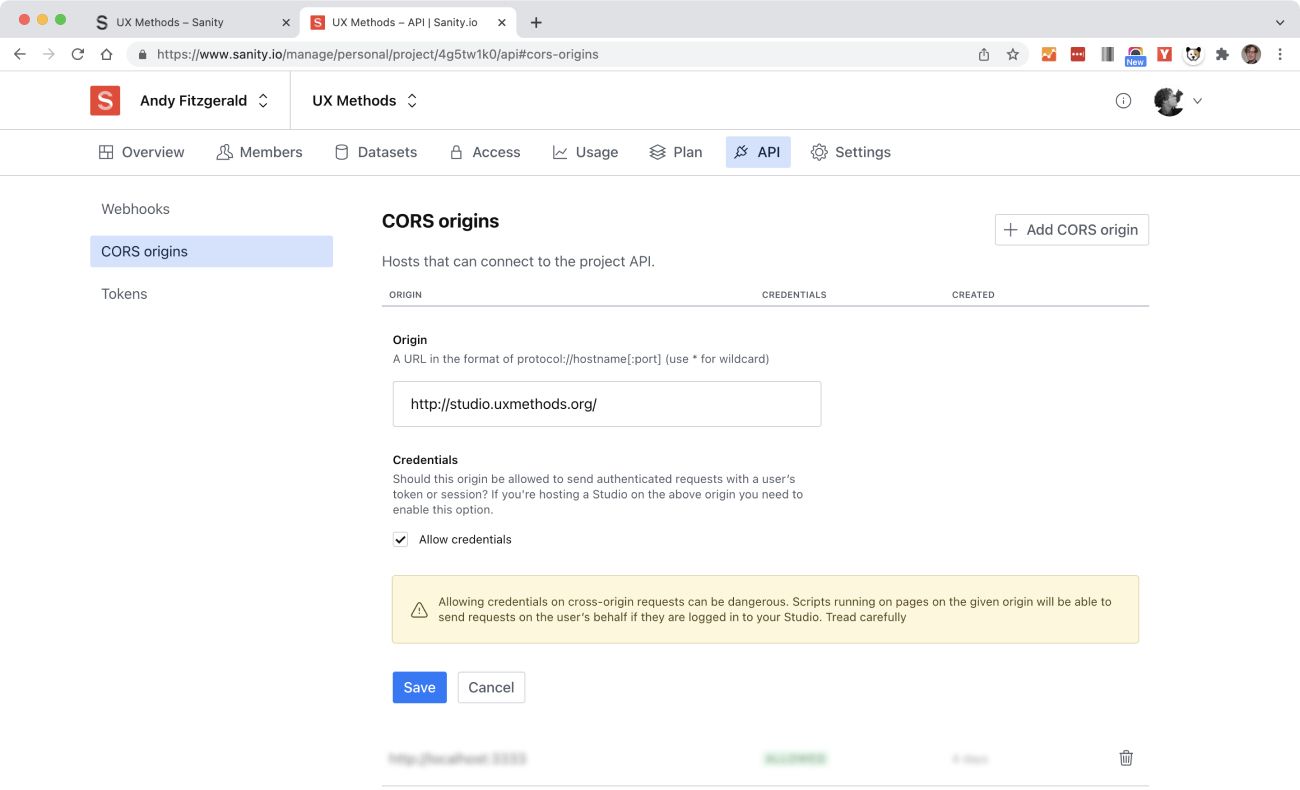
Click the “Add CORS Origin” button, then add the full URL of your studio subdomain in the “origin” field. Be sure to click the “allow credentials” box so that you can log in with your username and password:
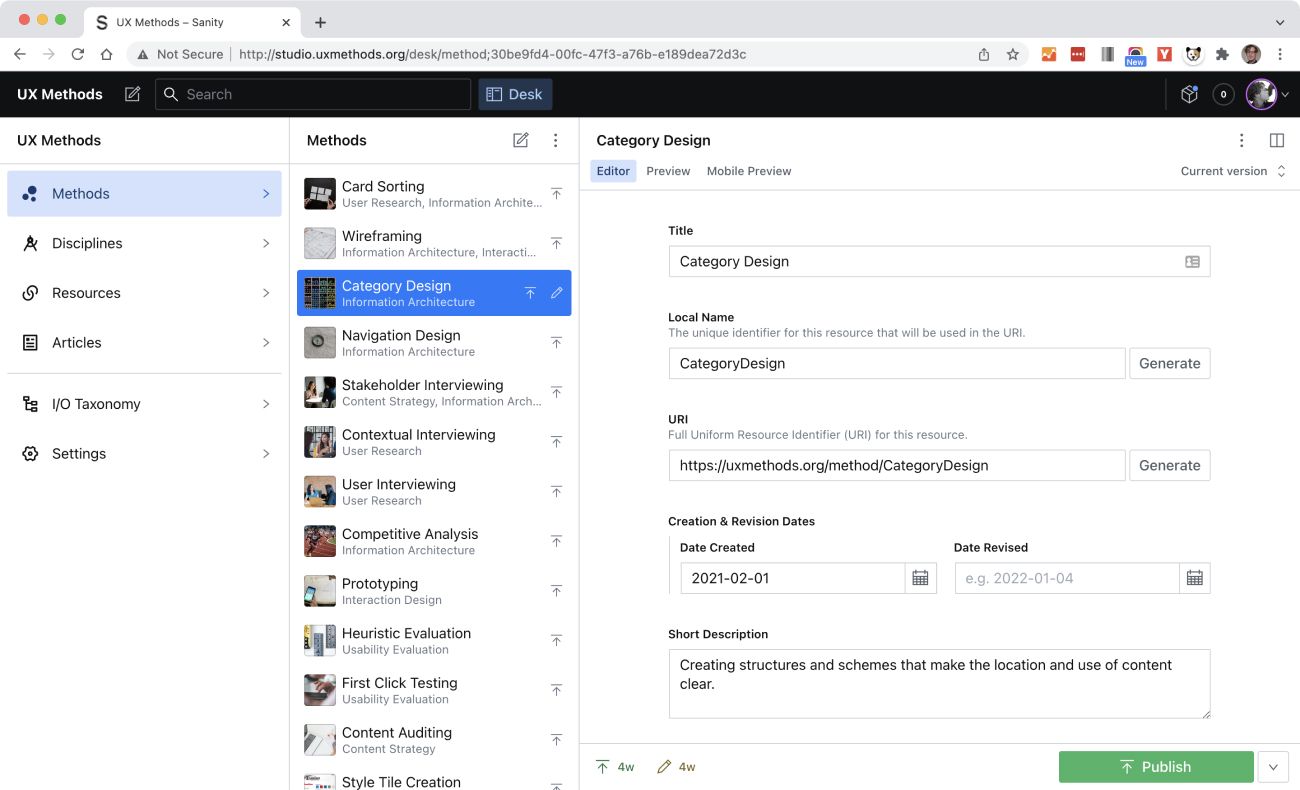
Now when you visit your Studio Subdomain and enter your Sanity username and password, you’ll find your self-hosted Sanity Studio up and running and waiting for new content.
Additional Use Cases
As you’ve no doubt picked up on by this point, self-hosting a Sanity Studio with continuous deployment via GitHub Actions involves a bunch of little steps—and, if your experience is like mine, usually at least some troubleshooting along the way. I really am sorry about the length of this guide, but if you’ve gotten this far I hope you’ve also realized that none of these steps are “magic” or beyond the grasp of someone with some fundamental computer skills and a healthy dose of determination.
Fortunately, once you get comfortable with the concepts and basic steps described here, there are a lot of other ways to use SSH and GitHub Actions to self-publish and automate parts of your workflow. For UX Methods, for instance, I use workflows to:
- Publish Sanity Studio (as shown here)
- Build and deploy the UX Methods production site
- Build a UX Methods staging site to iterate and experiment with new ideas
- Transform Sanity content into RDF triples and load them into a knowledge graph, which is used to create recommendations and navigation for UX Methods.
GitHub’s Actions Marketplace also has thousands of pre-built actions you can use and combine in jobs and workflows, and this list is growing all the time. Once you have the basics of how Actions work down, the possibility of what you might do with them is large indeed.
I hope this guide has helped you get a sense of how to use GitHub Actions to simplify your Sanity workflow—and has helped you build something useful in the process. If you run into any snags in the steps above, do check out the troubleshooting tips below. If something continues to befuddle you, or just won’t work, please let me know either in a comment or via email. I’ll respond where (and when) I can, and will update the troubleshooting guide with any tips others might find useful as well.
Troubleshooting
SSH Problems
Before you try to automate log-in, make sure you can log in with your password first:
$ ssh [email protected] $ YOUR_PASSWORD
If you can log in locally, your problem may be with permissions or passwords:
- Make sure you’ve added shell access
- Give the server time to propagate changes
- Reset your password if it’s not working (this one fixes a lot of log-in problems)
If you’re having problems with your RSA keys:
- Make sure you’ve added your public key to the DreamHost server, and that you’re using your private key to log in
- Be sure you’re using your user name and your server name (not my placeholders)
GitHub Actions Problems
Andrew Villazon gives some examples of how to use Secrets for your username and host name, in addition to using them for your public RSA key. I’ve omitted this extra level of security for the demos in this guide, but for production work, I recommend obscuring anything that might be used to gain unauthorized access to your repository and workflow.
Sanity Problems
Since Sanity Studio is a Single Page App (SPA), trying to navigate to any page (other than the index page) directly may lead to 404 errors unless your server supports SPAs already. You can correct this by adding an entry to the .htaccess file in your web directory. You can find some examples of working configurations here. (I use the first example shown on UX Methods and it works fine.)